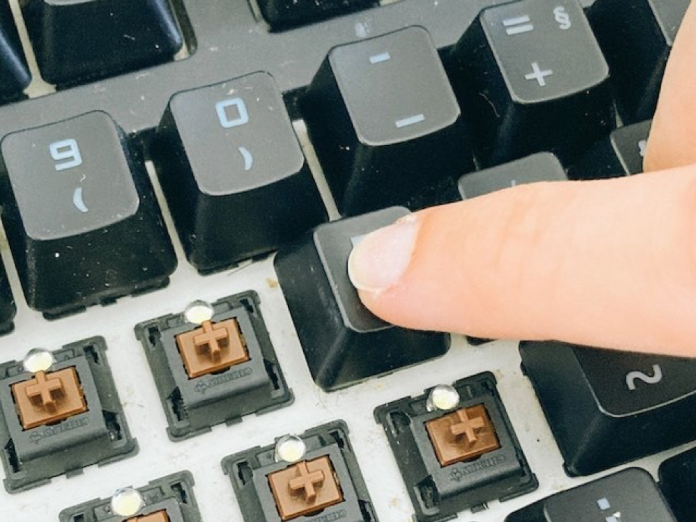
Switches are an essential component of a mechanical keyboard, as they determine the feel and actuation of the keys. If you want to replace a faulty switch or customize the switches on your keyboard, you will need to know how to remove switches from keyboard.
In this article, we will discuss how to remove switches from keyboard, but before that, it is essential to understand what keyboard switches are.
What are keyboard switches?
Keyboard switches are the mechanical components that register keystrokes on a mechanical keyboard. They are located under each key on the keyboard and consist of a housing, a spring, and a stem. When a key is pressed, the stem pushes down on the spring, which activates the switch and registers the keystroke.
There are several different types of keyboard switches, each with unique characteristics. They are used for gaming, typing, programming, and general computing.
How to remove switches from keyboard?
Below, we’ll discuss how to remove switches from a keyboard. So without further ado, let’s get straight to the point:
What you’ll need
Removing switches from your keyboard is fairly straightforward, but it requires some specialized tools. Before you get started, make sure you have the following supplies:
- Flathead screwdriver
- Keycap puller (or a thin piece of plastic or cardboard)
- Isopropyl alcohol
- Cotton swabs
- A soft cloth
- Anti-static wrist strap
- Once you have all supplies on your table, you’re ready to get started
Step 1: Prepare Your Workstation
Before starting the process, it is crucial to prepare your workstation. Ensure that you have a clear, clutter-free surface to lay out your keyboard and the tools you will use.
Ensure you have enough light to see the switches so that you don’t accidentally damage the board or yourself. Once you have everything set up and in place, you are ready to begin.
Step 2: Unplug your keyboard
After preparing your workstation, it’s time to start the process of how to remove switches from keyboard. Before pulling out any switches, unplug your keyboard from your computer or device.
To do this, locate the cord that connects your keyboard to your computer and firmly grasp both ends. Pull them apart slowly and carefully, careful not to damage either end of the cord. Once the keyboard is unplugged, set it aside on a flat surface and move on to the next step.
Step 3: Loosen the edges
Now that your keyboard is unplugged, it’s time to remove the switches. Start by flipping your keyboard over and examining the bottom of it. Depending on your keyboard model, you should see a row of small screws keeping the switches in place.
Using a small Phillips screwdriver, begin unscrewing the screws one at a time. Don’t remove them entirely yet; loosen them enough to pull the switches out without much effort.
If some screws are stuck, apply a small amount of lubricant to help loosen them. Once all of the screws are loosened, you’re ready to move forward to the last step of how to remove switches from keyboard.
Step 4: Pull the switches out
You can begin to pull the switches out of the keyboard. It is important to take extra care when doing this step to ensure that you do not damage any of the other components on the keyboard.
Start by grasping the switch and applying a gentle but steady force to it until it begins to come out of the keyboard. You may find it helpful to use a pair of tweezers to help grip and remove the switches.
By following these steps, you now know how to remove switches from keyboard.
Benefits of removing switches from a keyboard
There are several benefits to removing switches from a keyboard. These are:
Customization
Removing switches allows you to customize the feel and actuation of your keyboard by replacing the switches with ones that better suit your preferences.
Repair
If a switch on your keyboard is faulty or damaged, removing it allows you to replace it with a new one and restore the functionality of your keyboard.
Cleaning
Removing switches can also make it easier to clean your keyboard, as it allows you to access all areas of the keyboard more easily.
Precautions while removing keyboard switches
There are a few precautions during the process of how to remove switches from keyboard to ensure safety.
- Make sure the keyboard is powered off and unplugged.
- Use a switch puller tool or tweezers to remove the switch from the keyboard gently.
- Avoid using sharp objects or applying too much force.
FAQs
Can I remove the switches from my keyboard without specific tools?
Can I replace the switches on my keyboard?
Conclusion
In conclusion, learning how to remove switches from keyboard can be a valuable skill to have if you need to repair or modify your keyboard. Just follow the above-mentioned steps carefully and gently handle the switches to avoid damaging them. With the right techniques and a little practice, you should easily remove switches from your keyboard.


